Loading system data
From the Load Data tab in the System Administration section of the Command Center, you can manage data import settings for financial instruments, General Ledger (GL), and budgets.
The Load Data tab has two sub-tabs:
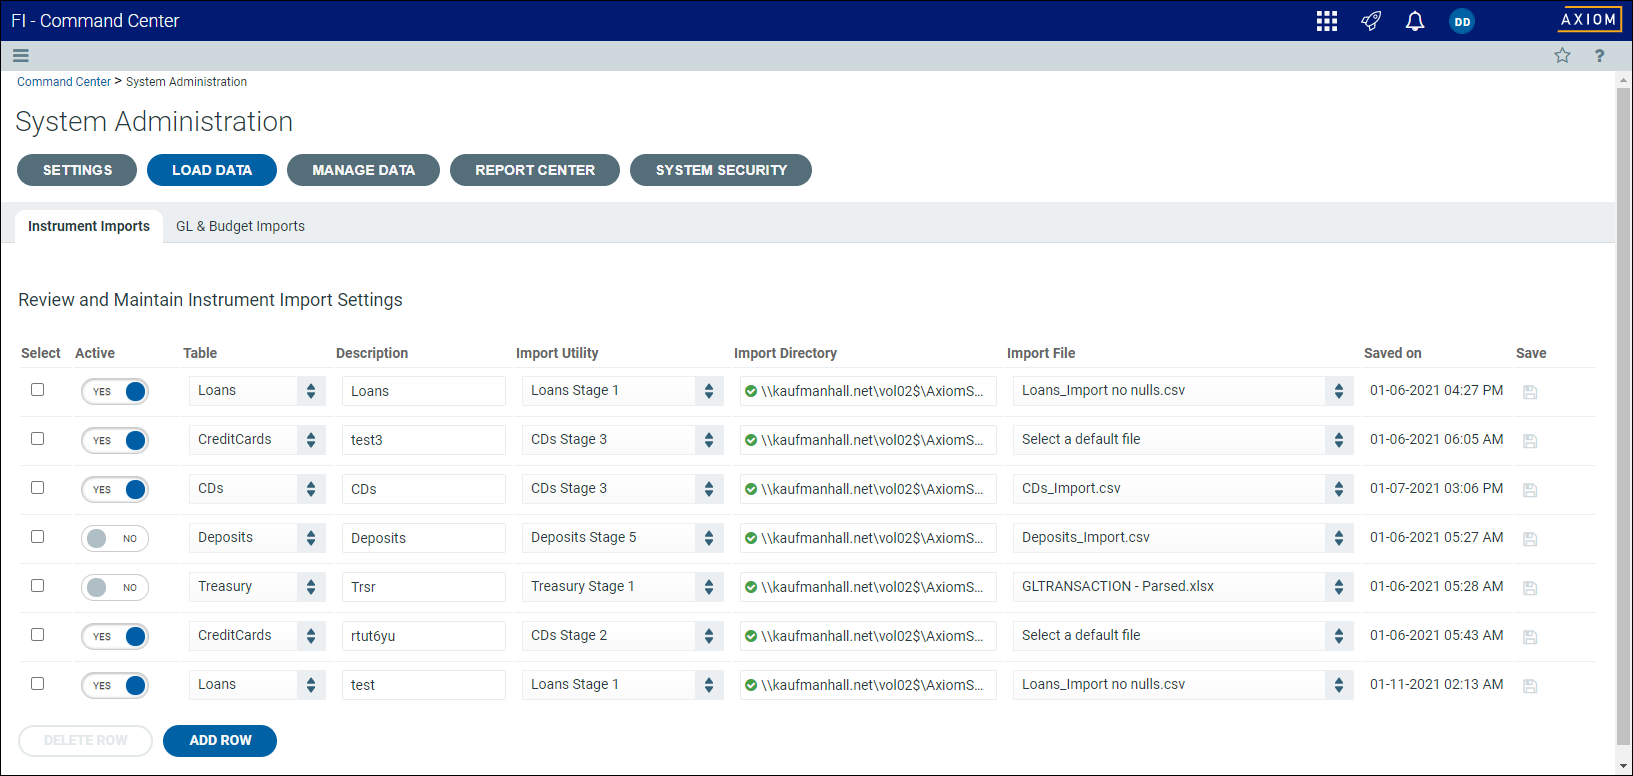
The Instruments Imports sub-tab allows you to manage import settings for all instruments.
Adding or editing data import settings for instruments
For more information about importing data for financial instruments, see Instrument Data Mart.
To add or edit data import settings for instruments:
-
From the Command Center, click System Administration.
-
Click Load Data, then click Instrument imports.
-
To add a new import, click Add Row. To edit an import, update the fields in the table below.
-
In each row, complete the following settings:
Column Description Active Do one of the following:
-
To activate the import, slide the toggle to Yes.
-
To disable the import, slide the toggle to No.
NOTE: When adding new import settings, this setting is set to Yes by default.
Table From the drop-down list, select the table that corresponds to the type of financial instrument associated with the import.
Description Enter a name for the import. For example, "Mortgage loans" to identify the loan system that is the source of the data. Import utility From the drop-down list, select an import utility based on the type of financial instrument and the process stage associated with the import.
More than one utility is available for each table and the utilities to be used are selected during the implementation.
Import directory As needed, enter or paste the directory path for the location of the import file.
TIP: If the system can reconcile the file path, the field displays a green check mark
 icon. If not, the field displays a red triangle
  icon. Hover your cursor over the truncated path name to view the entire path name.
 NOTE: For data already imported, the path shown is the saved path for the most recent import.
Import file Select a file from the drop-down list. Saved on This is a read-only field indicating the time and date of the most recent import and whether the file path was saved. -
-
After making your changes, in the Save column, click the disk
 icon.
icon.
Deleting data import settings for instruments
To delete import settings for instruments:
-
From the Command Center, click System Administration.
-
Click Load Data, then click Instrument imports.
-
Select the check box in the Select column for each setting to delete.
-
Click Delete Row.
GL & budget import settings sub-tab
The GL & budget import settings sub-tab allows you to manage settings for all general ledger and budget imports.
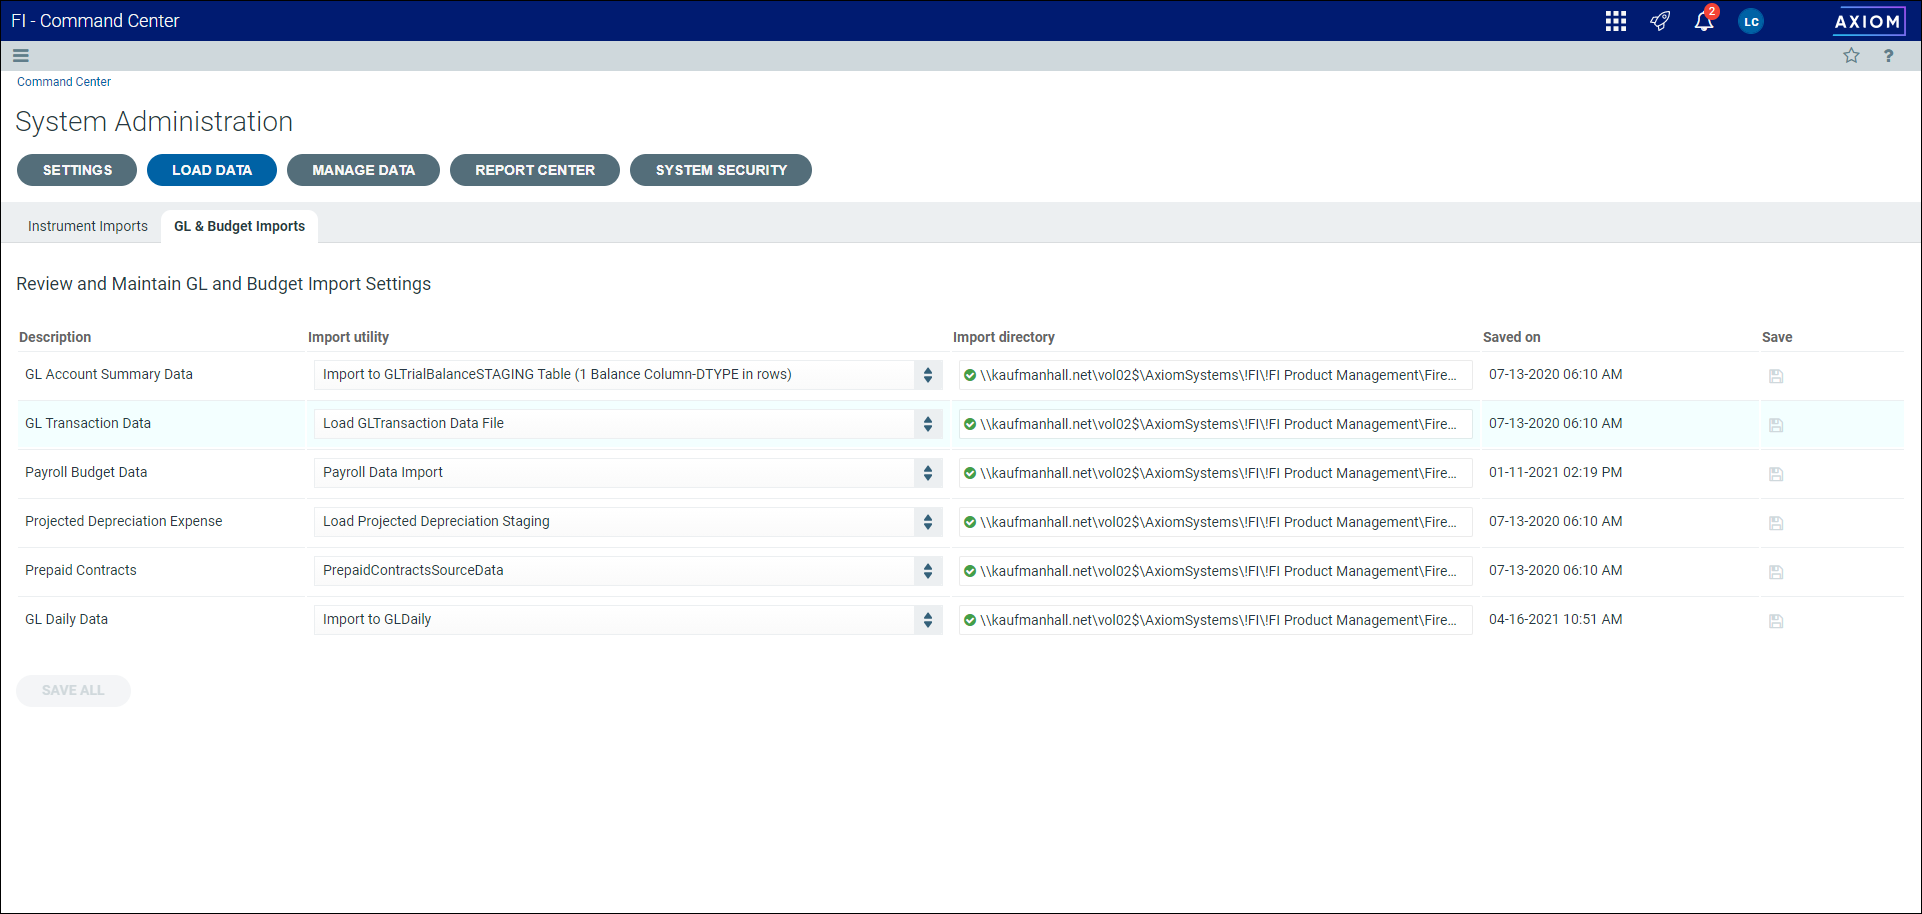
Editing import settings for GL and budget data
The GL & Budget Imports tab allows you to choose the utility and directory for each type of import.
To edit import settings for GL and budget data:
- From the Command Center, click System Administration.
- Click Load Data, then click GL & budget imports.
-
For each type of import, complete the following settings:
Column Description Description The description for the import setting. This field is not editable. Import utility From the drop-down list, select an import utility based on the type of GL or budget associated with the import.
TIP: In most cases, the GL Account Summary Data and GL Daily Data imports will use the same utility.
Import directory As needed, type or paste the directory path for the location of the import file.
TIP: If the system can reconcile the file path, the field displays a green check mark
icon. If not, the field displays a red triangle icon. Hover your cursor over the truncated path name to view the entire path name. NOTE: For data already imported, the path shown is the path used for the most recent import.
Saved on This is a read-only field indicating the time and date of the most recent import. -
Do one of the following:
- To save changes to individual settings, click the Save icon in the Save column.
- To save all changes, click Save All.
- To save changes to individual settings, click the Save
